![]()
Importance of toolbox
In CorelDraw an object is any item that we create or import into CorelDraw document. It can be rectangle, circle, a text, photograph or an image etc.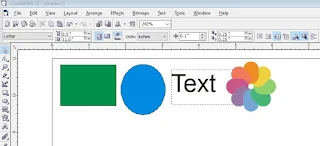
Drawing
Drawing is a work that we create in a CorelDraw for example poster, logo, flyers, newsletters etc.
The Pick tool
Pick tool is the main selection tool in CorelDraw and using it we can perform different functions such as selecting an object, resizing object, moving object, rotating object, skewing object.
Resizing an object- to resize an object we can follow following steps
The Pan tool lets us control which part of the drawing is visible in the drawing window.
To open this dialog we can follow following steps: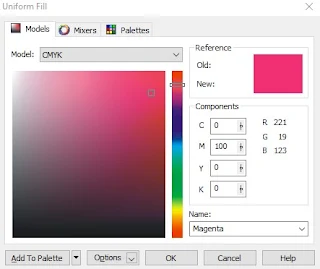
 Nodes
Nodes
CorelDraw toolbox contains various tools which we can use to select, edit, draw objects, add text etc.
We can move toolbox by dragging its top bar. Also we can show or hide toolbox by selecting
Window > Toolbars > Toolbox
Window > Toolbars > Toolbox

We can access flyout tools by clicking flyout arrow  Toolbox
The toolbox contains tools for drawing and editing images. Some of the tools are visible by default, while others are grouped in flyouts. A small flyout arrow in the lower-right corner of a toolbox button indicates a flyout. We can access the tools in a flyout by clicking the flyout arrow.

The toolbox contains tools for drawing and editing images. Some of the tools are visible by default, while others are grouped in flyouts. A small flyout arrow in the lower-right corner of a toolbox button indicates a flyout. We can access the tools in a flyout by clicking the flyout arrow.
There are numbers of tools available in the CorelDraw and these are:
- Pick tool-
 we can use this tool to select, position or transform objects.
- Shape tool-
 using this tool we can edit a curve object or text character by using nodes.
- Crop tool-
 we can use this tool to remove unwanted areas outside a selection.
- Zoom tool-
 using this tool we can change magnification level of document window.
- Free hand tool-
 using this tool we can draw curves and straight line segments.
- Smart Fill tool-
 using this tool we can create objects from overlapping area and apply a fill.
- Rectangle tool-
 using this tool we can draw squares and rectangles.
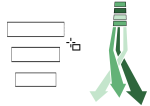
- Ellipse tool-
 using this tool we can draw circles and ellipses.
- Polygon tool-
 using this tool we can draw polygons.
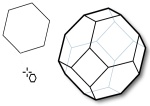
- Basic shape tool-
 using this tool we can draw triangles, circles, cylinders, hearts and other shapes.
- Text tool-
 using this tool we can edit paragraph and artistic text.
- Table tool-
 using this tool we can draw, select and edit tables.
- Blend tool-
 using this tool we can blend two objects.
- Eyedropper tool-
 using this tool we can select color from fill or an object.
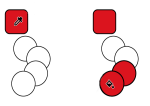
- Outline Pen tool-
 using it we can set outline properties thickness, corner shapes and arrow type.
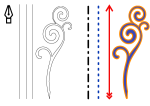
- Fill tool-
 using it we can fill color.
- Interactive Fill tool-
 using it we can create a dynamic fill and using property bar we can change the angle, midpoint and color of the fill.
In CorelDraw an object is any item that we create or import into CorelDraw document. It can be rectangle, circle, a text, photograph or an image etc.

Drawing
Drawing is a work that we create in a CorelDraw for example poster, logo, flyers, newsletters etc.

The Pick tool
Pick tool is the main selection tool in CorelDraw and using it we can perform different functions such as selecting an object, resizing object, moving object, rotating object, skewing object.
Resizing an object- to resize an object we can follow following steps
- Click Pick tool and select an object
- Click and drag on the corner handles to change the size of an object.
- Also we can resize an object using property bar which is located below the standard toolbar.

- Click pick tool and double click on the object.
- Now handles change to double ended arrow that indicates that object can be rotated now
- Now we can click and drag on corner handles to rotate.
- Also we can use property bar to rotate an object
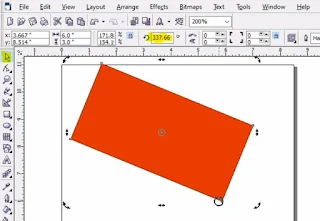
- Click the pick tool and double click on the object.
- Now double-ended arrow will appear.
- Click and drag on one of the middle handles to skew the object. Now release the mouse button when the desired effect is created.

The Zoom tool 
Using zoom tool we can perform following task.
Using zoom tool we can perform following task.
Zoom In- we can perform zoom in using following steps:
- Select zoom tool and left click on the object
- Now object will zoom in
- Repeat to zoom closer
Zoom Out- we can perform zoom out using following steps:
- Select zoom tool and right click on the object
- Now object will zoom out
- Repeat to zoom out
Marquee Zoom- marquee zoom is useful for close and enlarged view of a specific area. To use marquee zoom we can follow following steps:
- Select zoom tool
- Click and drag mouse over specific area of the document
- Now the specific area will zoom in.
The Pan tool 

To use it we need to follow following steps:
- Click on the black triangle at the bottom right corner of the Zoom tool and select Pan tool
- Now we can control which part of the drawing is visible in the drawing window.
Using rectangle tool we can create rectangle, square or similar figure in our drawing.
Creating rectangle
To create rectangle we can use following steps:
- Select rectangle tool
- Click and drag to create the rectangle.
- By dragging we can also hold down the Shift key to create a rectangle drawn form the center.
Creating square
To create square we can use following steps:
- Select rectangle tool
- Click and drag holding the Ctrl key to create perfect square.
- While dragging we can hold both Ctrl and Shift key to create a square drawn form the center.
The Ellipse tool-
Using ellipse tool we can draw circles, ellipses or similar figures in our drawing.
Creating ellipse
To create an ellipse we can use following steps:
- Select ellipse tool in the tool box.
- Click and drag in the workspace to create ellipse.
- While dragging we can hold Shift key to create ellipse drawn form the center.
Creating circle
To create a circle we can use following steps:
- Select ellipse tool in the tool box.
- Click and drag holding Ctrl key to draw perfect circle.
- While dragging we can hold both Ctrl and Shift key together to create a circle drawn form the center.
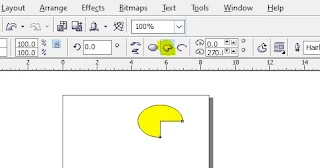
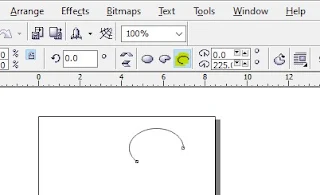
Creating pie shaped graphics
To create a pie shaped graphics we can use following steps:
Polygon tool-
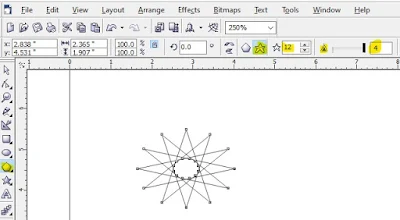
Using polygon tool we can create polygons and stars of various types
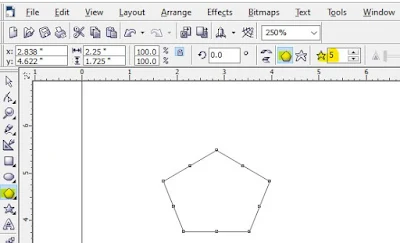
Creating polygon
To create a polygon we can use following steps:
Text tool- 
Text tool is used to add text, there are two types of text in CorelDraw - Artistic text
- Paragraph text
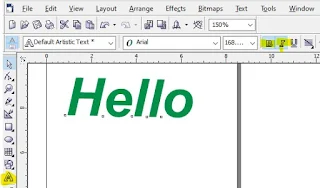
Artistic text- artistic text is used to write one or two lines text. It is mostly used for writing headings and captions.
Paragraph text- paragraph text is used to add large amount of text used to write paragraphs.
Adding artistic text
To add artistic text we can follow following steps:-
To add artistic text we can follow following steps:-
- First we need to select the Text tool and then we can click where we want to add the text
- Now blinking cursor will appear. Now we can start typing.
- When we are finished, then we can click Pick tool to to edit the text or we can press ctrl + space.
- Using active property bar we can change font size, bold it, italic it and can apply alignment etc.
- Also we can use Pick tool to move, resize, rotate, change the colour of the text.
Adding paragraph text
To add paragraph text we can follow following steps:-
- Select Text tool, click and drag somewhere in the document
- This creates a rectangle with dotted outline
- Now we can type text into the rectangle
- If we want to add text in another shape than first we need to draw the shape, than we can select Text tool and click inside the shape to add the text


Text along a curve
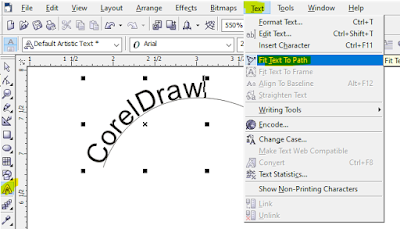
To add text along a curve we can follow following steps:-
- Select Text tool
- Click on object (circle, arc etc.)
- Choose Text > Fit Text To Path
- Now write some text
Fill color- 
CorelDraw provide Fill tool with various gradients, patterns, texture and postscripts fill to color an object. 

Uniform fill color dialog
- First we need to select Fill tool then we can click first icon or use shortcut key Shift + F11 to open Uniform Fill color dialog.
- Now using this dialog we can choose different color models such as RGB (Red, Green, Blue) and CYMK (Cyan, Yellow, Magenta, Black). Also we can use numeric value to modify color mode of selected model

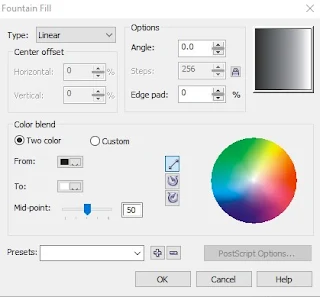
Fountain fill dialog
To open this dialog we can follow following steps:
- First we need to select Fill tool then we can click second icon or use shortcut key F11 to open Fountain Fill dialog.
- Now using this dialog we can make gradient fills for an object. There are four types of fountain fill linear, radial, conical and square.

Pattern fill dialog
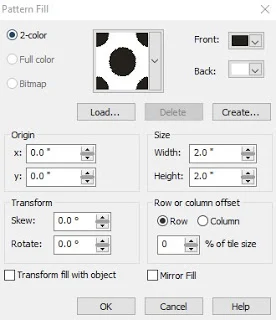
To open this dialog we can follow following steps:
- First we need to select Fill tool then we can click third icon to open Pattern Fill dialog.
- Now using this dialog we can apply pattern fill to an object. There are three types of pattern available in CorelDraw i) 2-color ii) Full color iii) Bitmap
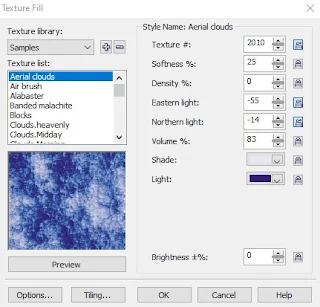
Texture fill
To open this dialog we can follow following steps:
- First we need to select Fill tool then we can click forth icon to open Texture Fill dialog.
- Now using Texture fill we can apply different available texture to an object.

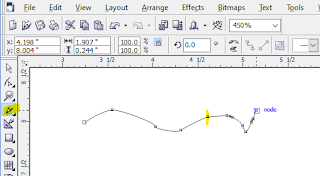
These are the small points along a line or curve that give it its shape. Without nodes we would not be able to create shapes. A shape can contain minimum two or thousand nodes. We can control nodes using Shape tool-
There are various types of nodes such as: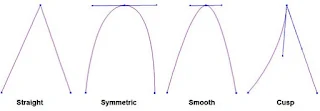

- Straight node- using straight node we can create straight line
- Symmetrical node- symmetrical nodes are used to create symmetrical lines and their handles also stay parallel to each other along with mirroring equal distance from the main node and constrains the angle of the direction line to 180 degree.
- Smooth node- using smooth node we can create smooth lines and the angle of directional lines are constrained to 180 degree.
- Cusp node- using cusp node we can create sharp angles and changes to one side of a node have no effect on the other side of node.
Free hand tool-
Using this tool we can draw curved line, straight line, closed shape etc.
How to draw Curved line using Freehand tool:-
- First we need to choose Freehand Tool or we can press F5 function key from the keyboard
- Now we can click and drag to draw the shape
- At last we can release the mouse button

- If we want to continue drawing the shape then we can click on the last node in the selection we have just completed.
How to draw Straight line using Freehand tool:-
- First we need to choose Freehand Tool or we can press F5 function key from the keyboard
- Now we can click and release mouse button to create Initial node for our straight line.
- Now we can move cursor to desired end of our line
- Finally we can click left mouse button to create End node for our straight line.

How to create Closed Shapes using Freehand tool:-
- First we need to choose Freehand Tool or we can press F5 function key from the keyboard
- Now we can click and drag in an approximate circular shape without closing the circular shape all the way to the starting point.

- Now to apply color to the circular shape we can use color palette at the right edge of the screen, but since ends are not closed, the fill does not show
- To close the shape automatically we can click Auto-Close Curve button in the Property bar.
- Now circular object will appear filled as the end points are joined.

How to group objects in CorelDraw
We can group objects in CorelDraw by using following steps:-
Select all objects with Pick tool
Click Arrange > Group or press Ctrl + g shortcut key from the keyboard
How to ungroup object in CorelDraw
We can ungroup objects in CorelDraw using following steps:-
Select grouped object with Pick tool
Click Arrange > Ungroup or press Ctrl + u shortcut key from the keyboard
How to duplicate object in CorelDraw
We can duplicate object in CorelDraw using the following steps:-
Select object using Pick tool
Now simply click Ctrl + d shortcut key from the keyboard
How to erase portion of an object
We can erase portion of an object by using following steps:-
Select Erase tool from Crop flyout
Now drag it over the object or portion of the object to erase.
UNIT-303

